Wednesday, September 5, 2012

For the Love of Batter

On a recent mention of my love of batter, I was asked, with a hefty dose of judgement, “You really eat that stuff?” With my head held high, I answered, “Yes. Yes I do.”  A latecomer to the conversation would have thought I just confessed to a heinous unsolved crime. I understand that there is a fear, although not in my house, of the danger of raw eggs. There’s also a chance I’ll be run over while I’m getting my mail. There was a farmer, a cow, and a chicken that all sacrificed for me to have the finest ingredients for my cake. Don’t you think I practically owe it to them to have a respectful few spoonfuls?

I don’t do drugs, there is no flask of liquor in my purse, I don’t steal or cheat, and I only cuss when absolutely necessary. As far as I’m concerned, if batter eating is my worst vice, I’m doing better than most. Like many others, I started as a child with the typical lick or two of the beaters or a tiny taste off the spoon. But once the mixer belonged to me, the beater treat alone just would not do.
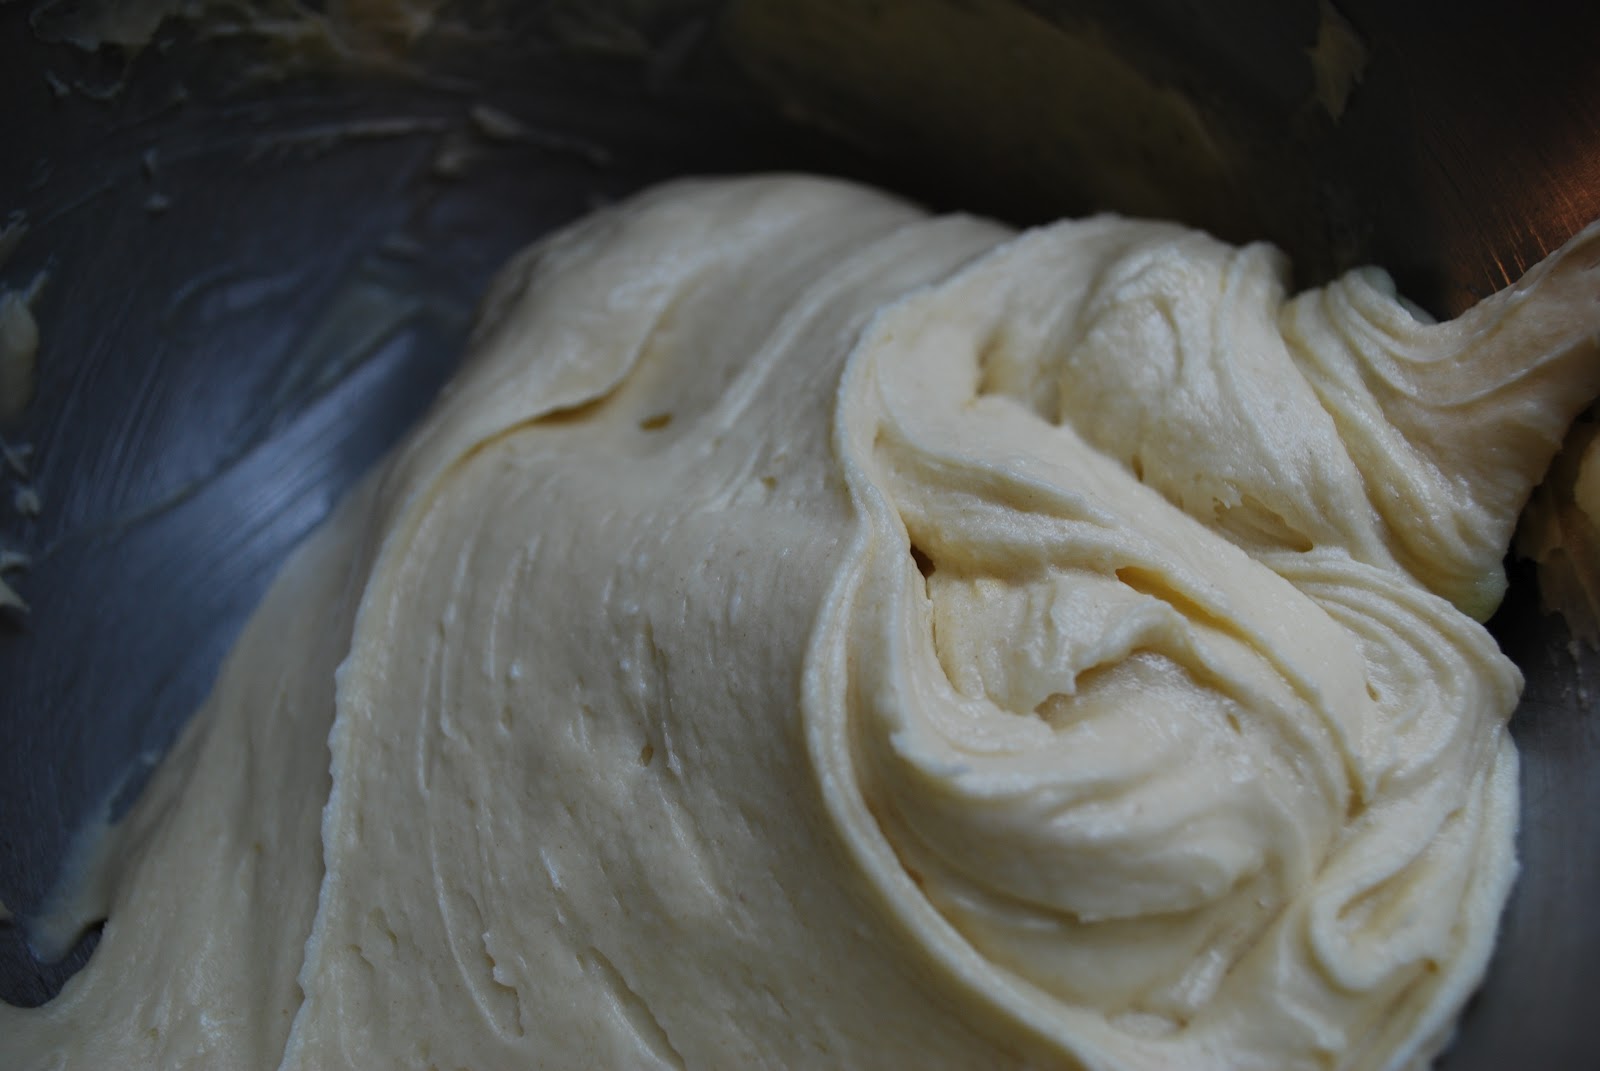
Cake batter is my creamy delight of choice (although I rarely decline a little raw biscuit dough). Pound cakes are always my first preference, but most batters will do. (Except red velvet. I just can’t eat blood red batter.) A few spoonfuls of buttery goodness makes a good day great and a bad day better. Normally, I don’t make cakes because I’m looking forward to a slice later in the day. It’s for a more immediate fix. It’s for the love of batter. Sure, my cakes end up being a tiny bit smaller, but it’s worth every millimeter of height.
Even with the overwhelming emotion I feel for batter, I would never be so reckless and irresponsible to recommend that you consume it. It’s way too dangerous. The liability would be immense. If you should ever find yourself holding a spoon mounded with batter, remember to eat only at your own risk. 

Pound Cake and a Half

This recipe is known as “Peach Mama Pound Cake and a Baby Cake” by my sweet 2 year old little girl. It’s perfect for our family. A fruity large pound cake and a small plain one. Just about any fruit will work in the larger cake. Blueberries and plums are really good.


3 sticks unsalted butter
8 oz. cream cheese
3 cups sugar
6 eggs
3 cups all-purpose flour (such as Gold Medal)
1/4 teaspoon salt
1 tsp. almond extract
2 cups chopped peaches (chopped into 1/2-inch pieces)
1. Preheat oven to 325°. Place butter and cream cheese in the bowl of a heavy-duty electric stand mixer, and beat at medium speed until light and blended (about 2 minutes).
Gradually add sugar, beating until blended. Add eggs, 1 at a time, beating just until yellow disappears after each addition.
2. Slowly add flour, stopping to scrape bowl as needed. Stir in almond extract.
Pour about 4 cups batter into a greased and floured 6-inch (4 1/2 cup) mini-bundt pan. Stir chopped peaches into remaining batter. Pour batter into a greased and floured 10-inch (11 cup) bundt pan.
3. Bake both cakes at 325°. Bake the baby cake for 45 minutes. Bake the larger cake for 1 hour 30 minutes or until a long wooden pick inserted in center comes out clean.
Makes: 2 cakes 

Monday, July 16, 2012

From Canada to my Georgia Kitchen


Field of Blooming Canola
Canola oil has been a staple in my kitchen for as long as I remember. I reach for it more often than I think about. For frying, sautéing, marinating, you name it and I’ve put Canola oil in it. Getting an opportunity to travel to the home of Canola was an invitation that didn’t require a second thought to accept. Until this trip to Saskatchewan, I knew very little about the origins of Canola. (I just knew it was good.) It’s a bit like not noticing the forest for the trees.
Canola Flower
I was privileged to be included in a select group of food professionals that were graciously invited to attend "Canola Camp" in Saskatoon, Saskatchewan (Hosted by CanolaInfo and the Canola Council of Canada). During my flight into Saskatoon, the land below looked like a glorious patchwork quilt of yellow and green. I was raised in a community surrounded by fertile farmland but had never seen lush and bright crops flourishing in every direction. The incredible blanket of color was contained only by the horizon.
Canola Seed
To really understand an ingredient, you have to see where it comes from, how it grows, and talk with those those that make a living by growing it. It's accurate that Canola oil has no trans fats or cholesterol and the most omega-3's of any oil. It's a fact that the oil is rich in Vitamins E and K. It's also true that Canola is the lifeblood of western Canada and the people there are just as vital to the growth of the plants as the sunshine itself. 
Like most crops, the journey that Canola takes from planting to pressing to enhancing recipes is lined with those that have invested so much of their lives and energy into the process that creates an oil that can be found in kitchens all over the globe. To have a glance into that world is nothing short of amazing.
My time up close and personal with Canola gave me craving for my cast-iron skillet. It's like catching fish all afternoon with no flame to cook them for supper. I will never again pour another tablespoon of Canola oil without picturing those glorious fields, the farmers, and the Canadian hospitality I was lucky enough to experience firsthand.

Fried Green Tomatoes

Serves 8

Canola oil
1 cup cornmeal
4 large green tomatoes (about 2 pounds)
1 cup all-purpose flour
1 teaspoon salt
1/2 teaspoon freshly ground black pepper
2 large eggs
1/4 cup buttermilk

In a large skillet, pour the Canola oil to a depth of 1/4 inch. Heat the skillet over medium heat until a pinch of cornmeal sizzles when sprinkled in.
While the oil heats, peel and slice the tomatoes into 1/2-inch-thick slices.
Combine the cornmeal, flour, salt, and pepper in a large mixing bowl. Combine the eggs and buttermilk in a small mixing bowl.
Coat each tomato slice with the cornmeal mixture; dip thoroughly in the egg mixture, and return to coat a second time in the cornmeal mixture.
Carefully place about half of the coated tomato slices in the hot oil and fry for 3 to 4 minutes per side, or until golden brown. Repeat with the remaining tomato slices.


Copyright © 2012 Rebecca Lang Cooks, LLC. All rights reserved.
Recipe adapted from Quick-Fix Southern (Andrews McMeel, 2011) by Rebecca Lang
www.rebeccalangcooks.com

Friday, June 1, 2012

Summertime Pea Salad


Nothing symbolizes summer like shelling peas on the porch. There were days growing up that the entire afternoon was spent on the screened porch with massive stainless steel bowls slowly being filled with pink-eyed purple hulls, white acres, or black-eyed peas. The floor was tiled with old newspapers to catch the hulls as they fell empty, one by one. Any leftover time before sundown was spent blanching and freezing enough peas to properly feed us through winter.
A sweet friend, Brooke Stortz, brought me a tremendous bag of shelled and ready to cook lady peas. I blanched a few for later and made a salad for supper. With Vidalia onions in season and real tomatoes now coming off the vines, this colorful salad is the epitome of summertime.

Lady Pea Summer Salad

5 cups shelled fresh lady peas
1 teaspoon salt
1 medium tomato, chopped
1 small Vidalia onion, diced
3 tablespoons chopped fresh basil
3 tablespoons extra virgin olive oil
1 tablespoon white wine vinegar
1 tablespoon fresh lemon juice
2 teaspoons Dijon mustard
Salt and fresh ground pepper to taste

Bring 7 cups water to a boil in a large saucepan. Add 1 teaspoon salt.  Add peas and cook for about 35 minutes, or until tender. Drain and cool. Transfer peas to a large mixing bowl. Stir in tomato, onion, and basil.
Whisk olive oil, white wine vinegar, lemon juice, and mustard together in a small measuring cup. Pour over peas and stir well. Allow salad to sit for 15 before serving.

Serves 4

NOTE: Salad can be made one day in advance. Add basil before serving.

Copyright © 2012 Rebecca Lang Cooks, LLC. All rights reserved.
www.rebeccalangcooks.com


Friday, May 11, 2012

A Mother's Love with a Side of Buttermilk Waffles


I have written about my grandmothers countless times, but very rarely do I write about my own mother. I no longer have my grandmothers and writing about them is the way I stay connected. Sa died long before I was old and smart enough to appreciate her presence and really deeply know her as an adult. Parkinson’s disease stole her from all of us. Tom passed away nearly in perfect health at the age of 100.
Mama is Tom’s daughter. (I don’t like the use of past tense for family. Even if a mother is no longer living, her child is still her child.) My mother goes by many names: Mama, Mandy, Mom, and Mimi and she is nothing short of my saving grace each day.
I often take her for granted, as many children do their mother. Until I became a mother six years ago, I had no comprehension of a mother’s love. I'd always heard of the depth of it and had a real respect for it, but honestly still had no clue. The very moment I laid eyes on my own child, I knew. I firmly believe that until you become a mother, you cannot truly grasp the all-encompassing, overwhelming strength of a mother’s love. Just like most mothers in the world, I would die without a second’s thought for either of my children, no questions asked. I love them unconditionally and passionately. Now, I know this is the love that my mother has for my sister and me.
Mama is giving, sometimes slightly shy (unless she is with those she knows well and then her big personality shines), loving, a gifted teacher, and a true friend. She spent 29 years of her life racing to school before the sun came up to teach second grade. She has an immense love for where she came from and my dad is still her center. As a daughter and her friend, I can say, I’m proud of her and who she is.
We don’t share the love of cooking but we share something much greater - a love of my children. I would trust her with them in any situation and know they love her nearly like they love me. I could not write an article, much less a cookbook, without her in the background keeping my family running and on track.
Mama is at my house several days each week to help me with my children. She is my shadow that is the helping hand in all I do. I am so grateful I don’t have a nanny or a long list of babysitters to spend valuable time with my children. I have my mama. She is someone that loves them wholeheartedly and relishes every second with them. A lifetime of Thank You's would not be enough.
None of us should wait until Mother’s Day to thank and appreciate our mothers. In several ways, all days are made possible by mothers everywhere. For the holiday, I'm hoping to start the day with homemade waffles, tell Mama how much I care, snuggle my babies as long as they'll let me, and squeeze in a nap or two.  

Soft Buttermilk Waffles
Makes 8 Belgian-sized waffles

Tom would make big batches of her waffles for us to keep in the freezer at our house. The soft, fluffy waffles would be stored for morning cravings or afternoon snacks. I still prefer my waffles soft like hers. When the steam stops coming out of the waffle maker, the waffles are ready.
The waffles can be frozen for up to 2 months by placing sheets of wax paper in between each one and sealing them in a resealable plastic freezer bag. Place the frozen waffles directly in the toaster for 2 to 3 minutes, or until toasted and lightly browned.

1/4 cup unsalted butter
2 tablespoons Crisco shortening
1 3/4 cups all-purpose flour
3/4 teaspoon baking soda
1 teaspoon salt
1/3 cup sugar
1 large egg
1 cup milk
3/4 cup buttermilk

Preheat a Belgian waffle maker according to the manufacturer’s directions.
Combine the butter and shortening in a microwave-safe measuring cup. Melt them in the microwave, about 45 seconds.
Combine the flour, baking soda, salt, and sugar in a large mixing bowl.
Whisk the egg, milk, and buttermilk together in a medium mixing bowl and stir into the dry ingredients. Slowly pour the melted butter and shortening into the batter.
Lightly spray the heated waffle maker with nonstick cooking spray. Pour half (about 2 cups) of the batter in the waffle maker. Cook according to the manufacturer’s instructions. Repeat with the remaining 2 cups of batter.

Copyright © 2012 Rebecca Lang Cooks, LLC. All rights reserved.  
Recipe from Quick-Fix Southern by Rebecca Lang, Andrews McMeel Publishing 2011
www.rebeccalangcooks.com

Thursday, March 29, 2012

Spring Recipes Supreme


The pollen count is in full swing, the sun hangs a little longer in the sky and the temperatures are climbing everyday. Easter is right around the corner and spring is here to stay. Like so many others, it's my favorite time of year. Little bursts of color cover nearly every inch of the outdoors and I'm close to breathless waiting for my first hummingbird to visit the feeder.
Cooking in spring is meant to be easy. God's already given us the freshest, best ingredients that have waited all winter to show off. Get to kitchen and usher in all the flavor of the season.

Little Beet Salad

Serves 4

 If you can’t find small beets, cut larger ones into 1-inch pieces. Although harder to find than the typical red, look for beets that are different colors, like white or yellow. Choose the beets with the greens attached.


3/4 pound small beets (about the size of a golf ball)
1 cup beet greens
2 tablespoons red wine vinegar
1 teaspoon coarse-grained mustard
1/8 teaspoon ground ginger 
1 tablespoon freshly squeezed lemon juice
1/4 teaspoon salt
3 tablespoons olive oil
3 cups mixed lettuce leaves

Remove the tops from the beets and peel the beets. Cut each beet into 4 wedges. Steam in a steamer basket for 18 minutes, or until fork-tender.
Meanwhile, choose 1 cup of the smallest of the beet greens, stack the leaves, and slice into ribbons. Set aside.
Whisk together the red wine vinegar, mustard, ginger, lemon juice, and salt. While whisking, slowly pour the olive oil into the vinegar mixture.
Combine the lettuce and sliced beet greens and arrange on a small platter. Toss the warm steamed beets with about half the dressing in a small mixing bowl. Pour the beets over the lettuce. Serve the remaining dressing on the side.


Jalapeño Deviled Eggs

Makes 24

12 large eggs
3/4 cup mayonnaise
1 tablespoon Dijon mustard
1 tablespoon finely chopped pickled jalapeño peppers
1/4 teaspoon salt

Cover the eggs with about 1 inch of cold water in a large saucepan. Bring the water to a boil over high heat. When the water boils, turn the heat off and let the eggs sit for 10 minutes. Submerge the eggs under cold water. Peel the eggs while holding them in running cold water. Slice the eggs in half lengthwise.
Remove the yolks from the eggs and place in a medium mixing bowl. Using a whisk, combine the yolks, mayonnaise, mustard, peppers, and salt.
Carefully spoon the yolk mixture back into the egg whites. 

Pecan-Crusted Racks of Lamb


Serves 6


2 (1 1/2-pound) racks of lamb, frenched
1/2 cup pecan halves
2 cups loosely packed fresh mint leaves
1/4 cup loosely packed fresh herbs
2 cloves garlic, minced
1/2 teaspoon salt
1/2 teaspoon freshly ground black pepper
1 teaspoon lemon zest
1/3 cup olive oil

Preheat the oven to 450˚F.  Line a rimmed baking sheet with aluminum foil. 
Place the racks of lamb on the prepared baking sheet. The racks should be lying down with the bones curving toward the bottom of the pan. 
Finely chop the pecans, mint leaves, and herbs. Place the pecans and minced herbs in a medium mixing bowl. Add the garlic, salt, pepper, and lemon zest. Stir in the olive oil. 
Using half of the herb mixture for each rack, spread the mixture on top of the racks. Pat the herb mixture gently so as to coat the entire top side. 
Bake at 450˚F for 25 minutes, or until a meat thermometer registers 130˚F for medium- rare. Let the lamb rest  at least 5 minutes before carving. To carve, slice between each bone.

Copyright © 2012 Rebecca Lang Cooks, LLC. All rights reserved.  
Recipes from Quick-Fix Southern by Rebecca Lang, Andrews McMeel 2011
www.rebeccalangcooks.com

Monday, March 5, 2012

Cooking with Lodge Cast Iron


Never ever, not in a million years, trust a Southern cook that doesn’t own a cast iron skillet. With qualities that don’t come easy, cast iron cookware is literally a must-have for even the most novice of cooks. No other cookware does what cast iron can do. Naturally nonstick, ready for a killer sear at all times, cast iron is comfortably at home both on the stovetop and the oven.
It’s not often that I look forward to the specific date a cookbook is released. The Lodge Cast Iron Cookbook had me checking my calendar and nearly marking off the days like a schoolgirl waiting for summer vacation. The cast iron skillet is the one piece of equipment that bonds all Southern cooks together. We all have one (in my case, several) and most of us list it near the top of our most treasured possessions. Lodge Manufacturing has been supplying cooks with cast iron for over four generations.
Most people cook just a few recipes in their cast iron and are missing out on so much of the fun. Now, thanks to this companion for the trusted cookware, the possibilities are endless. Cooking without Lodge is as silly as spending a Sunday morning on the back pew in a church with no preacher.
Pimento Cheese Panini Sandwich

Nothing is simpler to make for a quick dinner than a delicious sandwich served with a salad or a bowl of soup. This recipe from Gourmet Gadget Gal blogger Jane Gaither twists together two classic southern sandwiches, the pimento cheese and the BLT, and presses them into an oozy melt sure to please your family. If you don’t own a panini press, you can always use a smaller preheated cast iron skillet to press the sandwich down. This recipe makes enough pimento cheese for eight sandwiches but it will keep in your refrigerator for two weeks.

Makes 1 sandwich

Pimento Cheese Spread:
3 cups shredded cheddar cheese
One 4-ounce jar diced pimentos, drained
1/2 teaspoon minced garlic
1 teaspoon prepared horseradish
1 teaspoon hot sauce
1 teaspoon Worcestershire sauce
A few grinds of black pepper
6 tablespoons mayonnaise (Jane likes to use Dukes)

Panini:
2 slices (1/3-inch-thick) bread cut from a dense loaf
Softened butter
2 strips thick-sliced bacon (Jane uses Benton’s from Vonore, Tennessee), cooked until crisp
1 ripe tomato, sliced

1. In a medium bowl, mix together the ingredients for the Pimento Cheese Spread. 
2. Butter each slice of bread on one side.
3. Heat a 12-inch Lodge Grill Pan and Panini Press over medium-high heat.
4. Place 1 slice of bread, butter side down, on the hot grill pan. Spoon 3 tablespoons of the Pimento Cheese Spread onto the bread and spread it to the edges. Add the bacon and sliced tomato, then the second slice of bread with the butter side facing up.
4. Take the hot panini press and place it on top of the bread for 2 minutes, pressing gently to flatten the sandwich.
5. Remove the press, then remove the sandwich to a plate. Enjoy!

Vidalia Cornbread

Vidalia onions grow only in south Georgia and are available from late April until mid-September. They can be found in most grocery stores during these months. Carolyn Gonce LeRoy has had this recipe for over forty years and makes it often.

Serves 8

2 cups white self-rising cornmeal
1 tablespoon sugar
1 teaspoon baking powder
2 cups milk
2 tablespoons vegetable oil
1 large egg, slightly beaten
2 cups finely chopped Vidalia onions

1. Preheat the oven to 350°F. Grease a 9-inch cast iron skillet.
2. In a large bowl, combine the cornmeal, sugar, baking powder, milk, oil, and egg until well blended (the batter will be thin). Stir in the onions, mixing well.
3. Pour the batter into the prepared skillet and bake until golden brown, about 40 minutes. Let cool 10 minutes before cutting into wedges.

Recipes and images courtesy of The Lodge Cast Iron Cookbook (Oxmoor House, 2012)
Copyright © 2012 Rebecca Lang Cooks, LLC. All rights reserved. 

I was supplied a free review copy of The Lodge Cast Iron Cookbook from Lodge Manufacturing.

Monday, February 13, 2012

Sparkle on Valentine’s Day with Champagne Cocktails

Valentine's Day is not complete without a very girly, pink, bubbly and romantic cocktail. No matter how you celebrate this year, with friends, a significant other, or a quiet night alone, make the holiday sparkle with a glass that instantly adds fun.

Cranberry Splash
Serves 12

6 cups red cranberry juice
1 (750-milliliter) bottle champagne

Pour cranberry juice into Champagne glasses, filling half of glass.  Slowly pour Champagne over cranberry juice until glass is filled.  

 
Strawberry Kiss

Serves 8 to 10

1 pound fresh or frozen strawberries, thawed
1 (750-milliliter) bottle Champagne

Remove the stems from the strawberries and place the berries in a food processor fitted with a metal blade. Process until pureed. Pour the Champagne into glasses, leaving about 1 inch at the top of each glass. Add 2 tablespoons pureed strawberries to each glass.


Raspberry Bubbly

Serves 8

1/2 cup blackberry schnapps
1 (750-milliliter) bottle Champagne
Raspberry sorbet

Pour 1 tablespoon blackberry schnapps into the bottom of each of 8 champagne glasses. Top each with Champagne, leaving at least 1 inch at the top of the glass. Using a melon baller or a small scoop, drop one small ball of sorbet into each glass.
The Champagne will fizz with the sorbet.

Copyright © 2012 Rebecca Lang Cooks, LLC. All rights reserved.